
Disclaimer: I am not affiliated with Cloudflare nor they sponsor me. This article is for sharing information that I find useful.
🧑💻 This post assumes you have intermediate experience with the command line and Git front-ends like GitHub.
When looking for a hosting solution for a static website that has a free tier, there are many options including Github Pages, Neocities, and Codeberg Pages
Cloudflare Pages has a free tier that is pretty permissive, at the time of writing they offer:
- 1 build at the time
- 500 builds per month
- 100 custom domains per project
- Unlimited sites
- Unlimited static requests
- Unlimited bandwidth
💡 You can read about its limits on this site
Let’s start

Photo by Clément Hélardot on Unsplash
First, go ahead and create an account on Cloudflare if you don’t have one.
We are gonna use GitHub, to take advantage of their CI/CD platform.
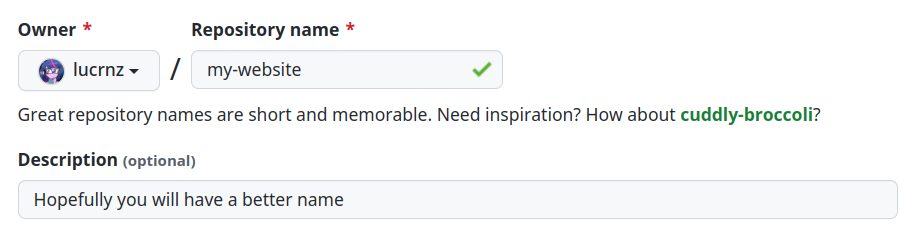
Let’s create a new repository:
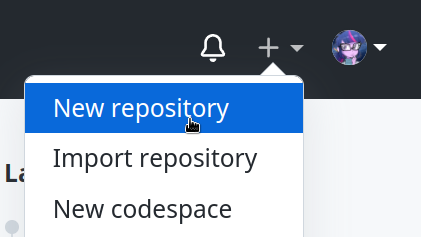
You can name it whatever you want! You are free to choose private or public repo too.
Go ahead and copy the clone URL that is shown on top of the screen.
Open your favorite terminal emulator, and clone it:
🪟 For the Windows operative system, please continue on WSL. If you don’t have it, go ahead and install it and configure it.
git clone git@github.com:lucrnz/my-website.git my-website
cd my-website/
Now we have to log in to Cloudflare or create an account by using their command line tool.
For this, you will need Node installed on your computer.
npx wrangler login
This will show you an URL that you have to copy and paste into your web browser to continue the login, there you can create your Cloudflare account if you don’t have one.
Writing the code
We are going to create an example website to deploy, additionally, we are gonna use SCSS to show off in our automatic deployment.
✏️ Let’s create our starting files:
touch .gitignore
touch index.html
touch style.scss
Edit the index.html file with the following contents:
<!doctype html>
<html lang="en">
  <head>
    <meta charset="UTF-8" />
    <meta http-equiv="X-UA-Compatible" content="IE=edge" />
    <meta name="viewport" content="width=device-width, initial-scale=1.0" />
    <title>My Awesome Website</title>
    <link rel="stylesheet" href="style.css" />
    <link rel="preconnect" href="https://fonts.googleapis.com" />
    <link rel="preconnect" href="https://fonts.gstatic.com" crossorigin />
    <link
      href="https://fonts.googleapis.com/css2?family=Mulish:wght@700&family=Poppins:wght@300;400&display=swap"
      rel="stylesheet"
    />
    <link
      rel="stylesheet"
      href="https://cdnjs.cloudflare.com/ajax/libs/font-awesome/6.2.1/css/all.min.css"
      integrity="sha512-MV7K8+y+gLIBoVD59lQIYicR65iaqukzvf/nwasF0nqhPay5w/9lJmVM2hMDcnK1OnMGCdVK+iQrJ7lzPJQd1w=="
      crossorigin="anonymous"
      referrerpolicy="no-referrer"
    />
  </head>
  <body>
    <header>
      <nav role="navigation">
        <a href="#home">Home</a>
        <a href="#projects">Projects</a>
        <a href="#about">About</a>
        <a href="#contact">Contact</a>
        <a class="hamburger" href="#"><i class="fas fa-bars"></i></a>
      </nav>
    </header>
    <section class="hero">
      <div>
        <img
          src="https://images.unsplash.com/photo-1502481851512-e9e2529bfbf9?ixlib=rb-4.0.3&dl=eberhard-grossgasteiger-cs0sK0gzqCU-unsplash.jpg&w=1920&q=80&fm=jpg&crop=entropy&cs=tinysrgb"
          alt="Sky and clouds"
        />
        <div class="fill">
          <div class="text">
            <img
              class="icon"
              src="https://www.fakepersongenerator.com/Face/male/male20161083878395203.jpg"
              alt="A photo of David"
            />
            <h2 class="title gradient-text">David Balke</h2>
          </div>
        </div>
      </div>
    </section>

    <section id="about" class="container">
      <div class="wrapper">
        <div class="content-left">
          <h2>About me</h2>
          <p>
            Lorem ipsum dolor sit amet, consectetur adipiscing elit. Duis
            condimentum ante quis ultricies malesuada. Sed convallis massa eget
            sapien consectetur lacinia. Nam nisl nunc, congue malesuada
            fermentum eu, egestas non ligula. Mauris sit amet augue at tortor
            cursus posuere in sit amet risus. Duis quis venenatis eros, nec
            suscipit turpis.
          </p>
        </div>
        <div class="content-right">
          <img
            src="https://images.unsplash.com/photo-1457530378978-8bac673b8062?ixlib=rb-4.0.3&dl=francesco-gallarotti-ruQHpukrN7c-unsplash.jpg&w=1920&q=80&fm=jpg&crop=entropy&cs=tinysrgb"
            alt="Plants"
          />
        </div>
      </div>
    </section>

    <footer>
      <div class="container">
        <p>Copyright © 2023 Hero Layout Website</p>
        <ul class="social-links">
          <li>
            <a href="#"><i class="fab fa-mastodon"></i></a>
          </li>
          <li>
            <a href="#"><i class="fab fa-instagram"></i></a>
          </li>
          <li>
            <a href="#"><i class="fab fa-twitter"></i></a>
          </li>
        </ul>
      </div>
    </footer>
  </body>
</html>
💅 Let’s now give it a stylesheet, edit the file style.scss
$border-radius: 8px;

:root {
  font-family: "Poppins", sans-serif;
}

h1,
h2 {
  font-family: "Mulish", sans-serif;
}

h1 {
  font-size: 3.5rem;
}

h2 {
  font-size: 2.6rem;
}

header {
  &:after {
    content: ".";
    display: block;
    height: 0;
    clear: both;
    visibility: hidden;
  }

  nav {
    float: right;
    display: flex;
    flex-direction: row;
    gap: 8px;
    justify-content: space-between;
    padding: 10px 20px;

    .hamburger {
      display: none;
      @media (max-width: 768px) {
        display: block;
      }
    }

    a {
      font-size: 20px;
      color: scale-color($color: #333, $lightness: 25%);
      text-decoration: none;
      font-size: 18px;
      padding: 10px 20px;

      &:hover {
        color: #333;
      }

      &:not(:last-child) {
        @media (max-width: 768px) {
          display: none;
        }
      }
    }
  }
}

.hero {
  position: relative;
  padding: 5px;
  height: 350px;

  @media (min-width: 1200px) {
    padding: 40px;
  }

  & > div {
    position: relative;
    width: 100%;
    height: 100%;

    & > img {
      border-radius: $border-radius;
      width: 100%;
      height: 100%;
      object-fit: cover;
    }

    .fill {
      position: absolute;
      top: 0;
      left: 0;
      right: 0;
      bottom: 0;
      background-color: rgba(0, 0, 0, 0.15);
      display: flex;
      justify-content: center;
      align-items: center;

      img.icon {
        width: 128px;
        height: 128px;
        border-radius: 50%;
      }

      & > .text {
        display: flex;
        flex-direction: row;
        gap: 20px;
      }

      .text h2 {
        color: #fff;
      }
    }
  }
}

.container {
  padding: 40px;

  & > .wrapper {
    display: flex;
    flex-direction: column;
    align-items: center;
    justify-content: space-around;
    text-align: center;

    @media (min-width: 1200px) {
      flex-direction: row;
    }

    .content-left {
      max-width: 560px;
    }

    .content-right img {
      max-height: 350px;
      border-radius: $border-radius;
    }
  }
}

footer {
  border-radius: $border-radius;
  background-color: #333;
  color: white;
  text-align: center;

  .container {
    display: flex;
    justify-content: space-between;
    align-items: center;
    max-width: 1100px;
    margin: 0 auto;

    .social-links a {
      color: white;
      font-size: 1.5rem;
    }

    .social-links {
      list-style: none;
      margin: 0;
      padding: 0;
      display: flex;

      li {
        margin: 0 10px;
      }
    }
  }
}
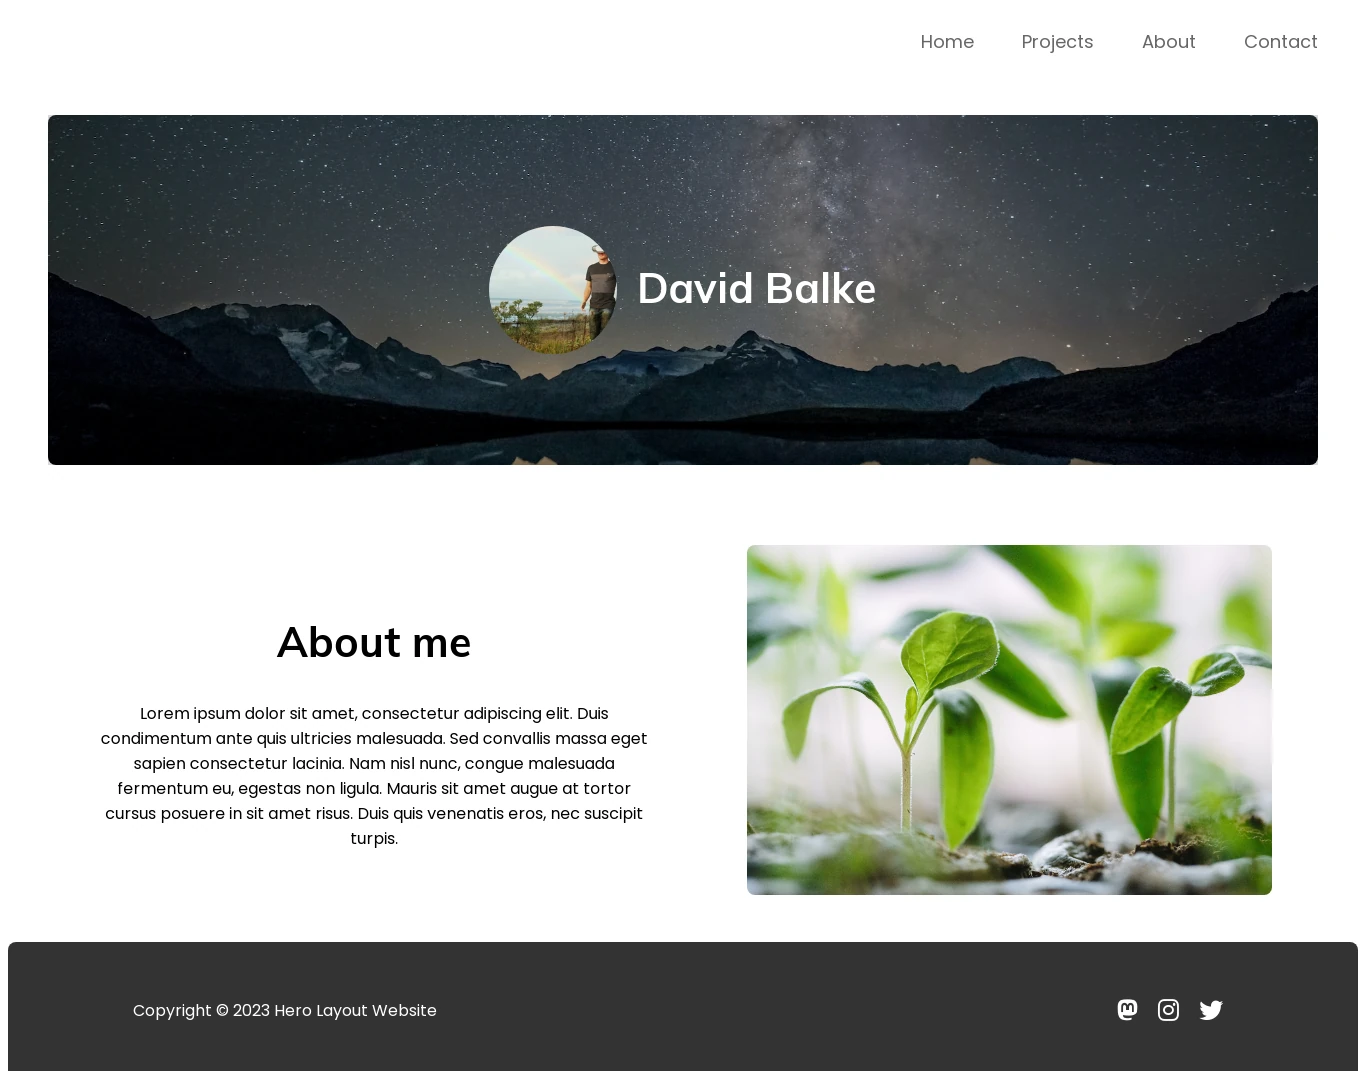
💡 This code defines a simple personal website that is about a fake person. You can replace the text if you want. The website uses a layout known as “hero” which is a large image at the top of the page. The image is responsive and will adapt to the size of the screen.
Let’s now compile the stylesheet, and run the following command:
npx sass style.scss style.css
You can also use the --watch option to automatically recompile the stylesheet when you edit the file.
npx sass --watch style.scss style.css
For being able to preview the website, we will use Python’s built-in HTTP server.
python -m http.server
You can now open the website at http://localhost:8000
It should look like this:
Taking care of the deployment
🧰 Let’s create a simple script that takes care of building the website.
mkdir -p scripts
touch scripts/build.sh
Edit the file scripts/build.sh:
mkdir -p dist
npx sass style.scss dist/style.css
cp index.html dist/index.html
For making git ignore any built files, edit the file .gitignore:
# Ignore dist folder
dist/

# Style is managed via sass
style.css

# Ignore css maps
*.css.map
We will commit the changes to git.
git add .
git commit -m "Initial commit"
Let’s create a new Cloudflare pages project.
npx wrangler pages project create my-website
Now we only need to tell Cloudflare Pages to run this script when deploying the website.
For this let’s create our GitHub Actions workflow.
mkdir -p .github/workflows
touch .github/workflows/build.yml
Edit the file .github/workflows/build.yml:
name: Build and deploy

on:
  push:
    branches: ["main"]

jobs:
  build-and-deploy:
    runs-on: ubuntu-latest
    strategy:
      matrix:
        node-version: [20]

    steps:
      - name: Checkout code
        uses: actions/checkout@v4

      - name: Set up Node.js
        uses: actions/setup-node@v4
        with:
          node-version: ${{ matrix.node-version }}
          cache: 'npm'

      - name: Install dependencies
        run: npm ci

      - name: Build project
        run: bash scripts/build.sh

      - name: Deploy to Cloudflare Pages
        run: npx wrangler pages deploy . --project-name=my-website
        env:
          CLOUDFLARE_API_TOKEN: ${{ secrets.CLOUDFLARE_API_TOKEN }}
        working-directory: dist
⚠️ Don’t forget to replace
my-websitewith the name of your website, this is shown in your Cloudflare Pages dashboard.
Before we can deploy the website, we need to create a secret that contains the API token for Cloudflare Pages.
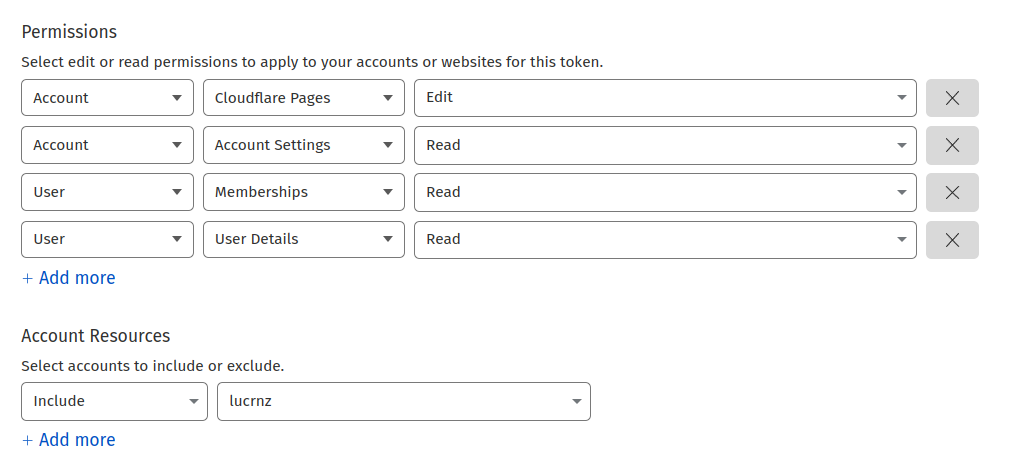
Go to the Cloudflare API Tokens page and create a new token with the following permissions:
- Account: Cloudflare Pages: Edit
- Account: Account Settings: Read
- User: Member Permissions: Read
- User: User Details: Read
In the section called Account Resources, select the account that you want to deploy to.

Now that you have created the token, go to the Github secrets page:
- Navigate to the repository settings, then to the secrets page and click on
New repository secret
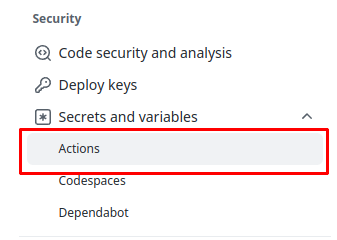

Name it CLOUDFLARE_API_TOKEN and paste the token you created earlier.
Click the Add secret button.
Now we will push the code to GitHub and let GitHub Actions do the rest.
git add .
git commit -m "Add GitHub actions workflow"
git push origin main
Conclusion
Open GitHub Actions to see the workflow running, it should take a few minutes to deploy the website.

💡 To avoid hitting the free build limit, you can make changes to the website in a new branch and then merge it to the main branch when you are done developing those changes.
🎉 Congratulations, you have successfully deployed your website to Cloudflare Pages!